This is a long-awaited blog post! (and a long-winded post…brace yourself) It seems like months ago when the contractor was here with his guys transforming the kitchen. In reality it’s been about 6 weeks since they left, but only 3 hours since I’ve declared the room “officialy” FINISHED! ….for now:) (One of these days we’ll get to replace the current beat up floors with beautiful new tile!) I’ve also included a source list at the bottom of the post; affiliate links included.
The last time I posted I talked about the top storage cabinet amazon. That was a huge bummer, but I recovered from my mistake and took the doors back to the cabinet guy to be repainted. Thankfully he cut us a bit of a deal, but that meant it was up to me to paint everything except the doors…and that was fine by me! It didn’t take long to paint the cabinets. I just used a small foam roller and a high quality oil-based paint. Easy-peasy.
When the doors were finished being painted they looked great at the shop, but as soon as I got them home I noticed that they looked slightly blue. Seriously. Not even slightly joking. It was the most faint of a blue tint, but blue none the less. I was so frustrated and beyond ready for things to be finished. I took the doors back to the cabinet guy and I can thankfully say that the 3rd time was a charm!
I took a ton of pictures & I hope you can get a good feel for what it looks like, but I always feel like pictures don’t do it justice!
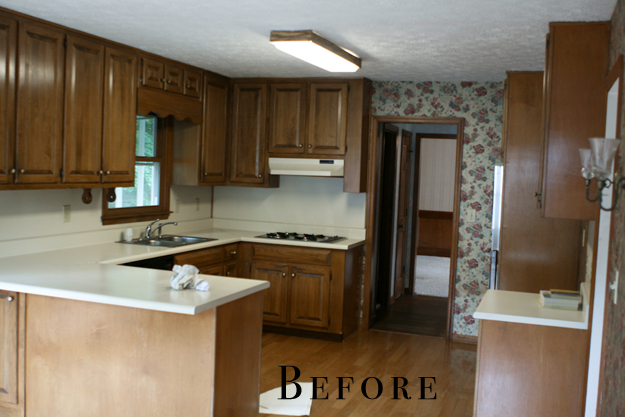
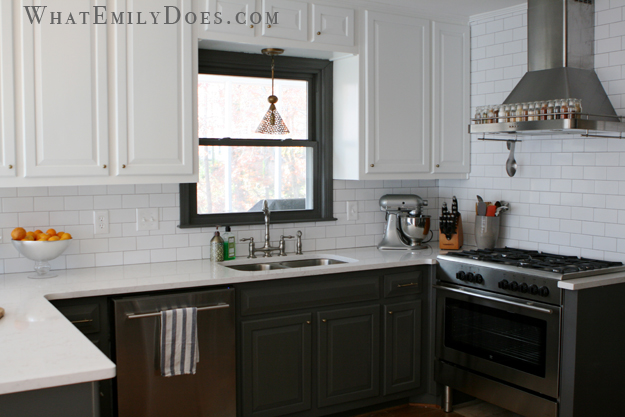
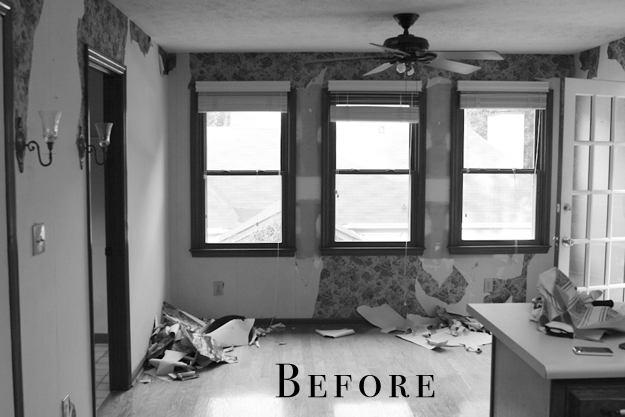
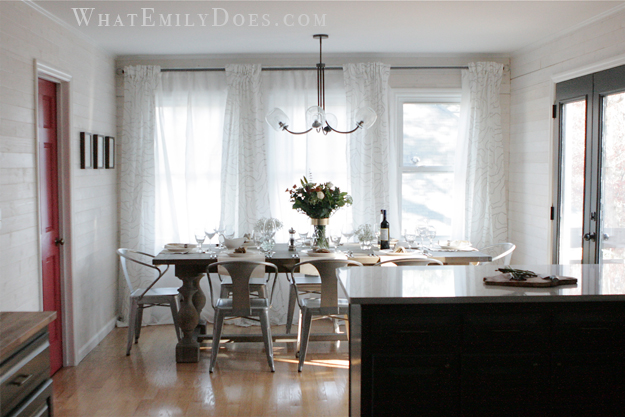
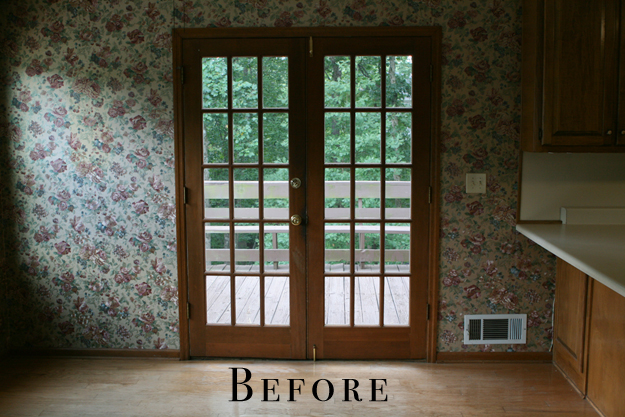
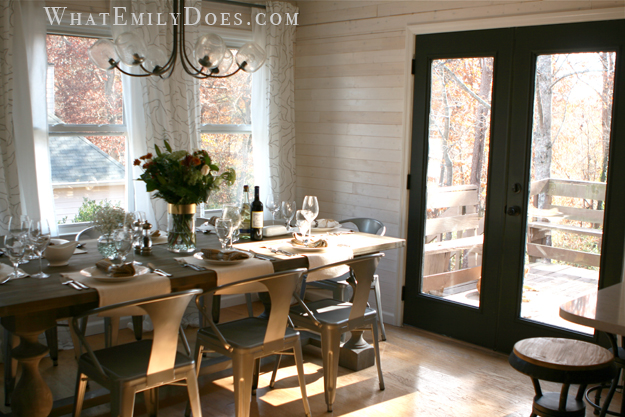
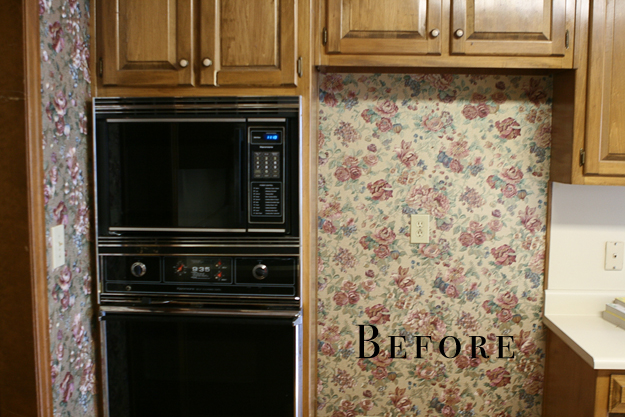
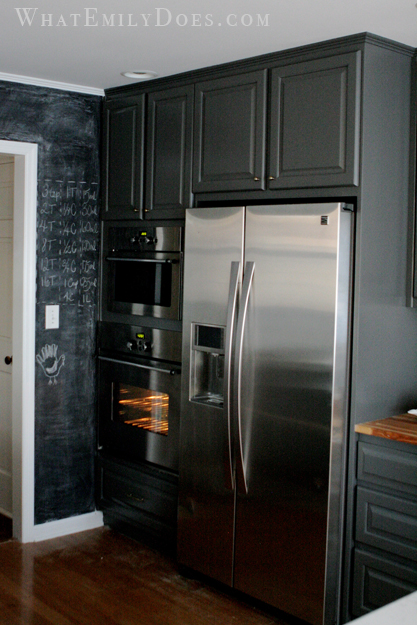
Having the cabinet built to surround the refrigerator is hands-down the best decision I think I made in the kitchen. The built-in look makes the room look so finished and luxurious.
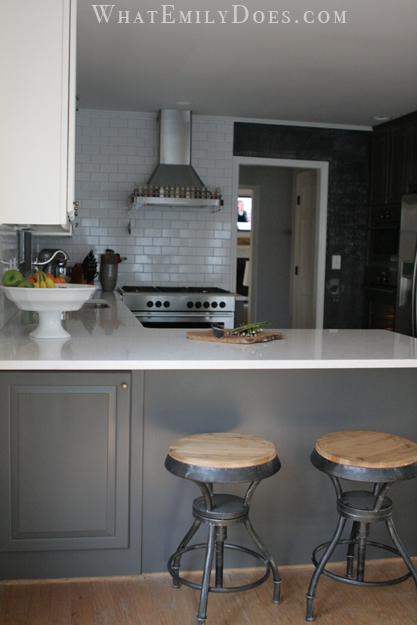
These industrial stools are from Home Goods. I got them at a great deal of $80 each!
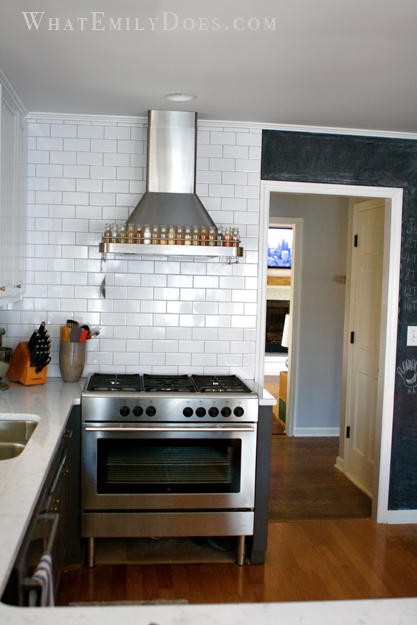
Please ignore the bare flooring under the range. Once we have saved up for new floors it will no longer be naked under there, we’re thinking about installing high-quality acoustic flooring.
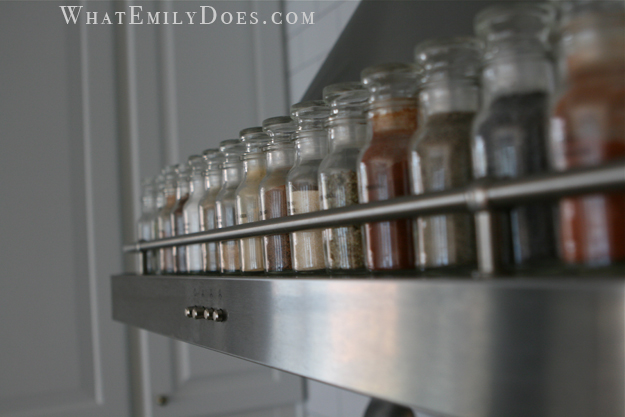
Alex put my spice jars on top of the hood. I’m not sure what I think of it. I really like the functionality of it, and I’m a big believer that a kitchen should first and foremost be functional. But sometimes it reminds me of dorm room living where you find any corner of space to use as storage, except that we have cabinets with plenty of room for storage. They stay for now.
Interesting fact: the spice jars were a wedding present to my mom and dad that they never opened. They were in my Grandaddy’s attic until recently. I think they are so pretty!
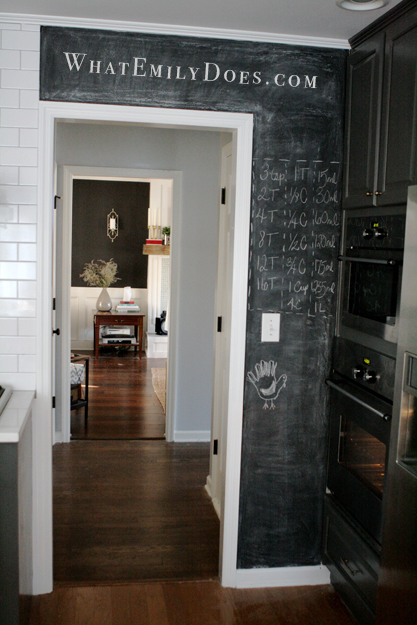
This is the view looking in to the living room. I like that the little bit of chalk board wall compliments the walls in the living room.
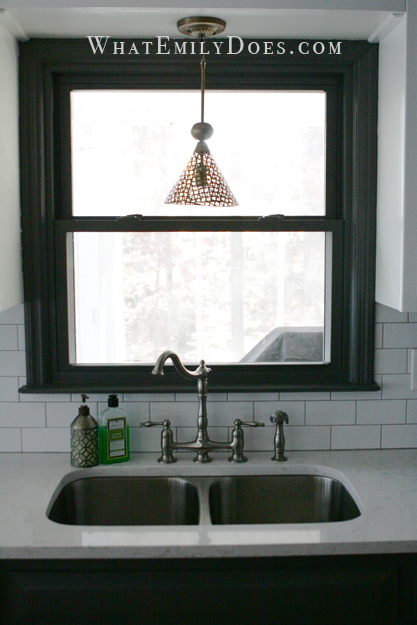
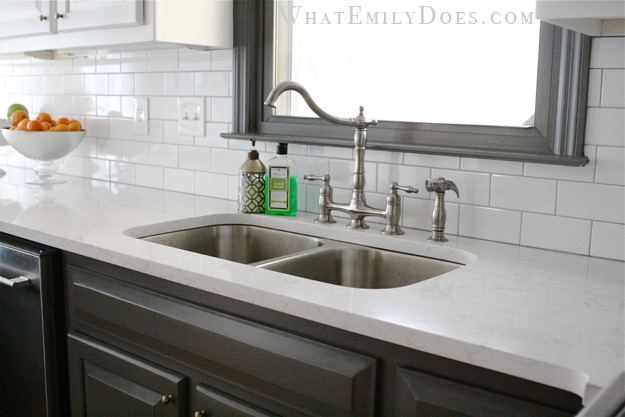
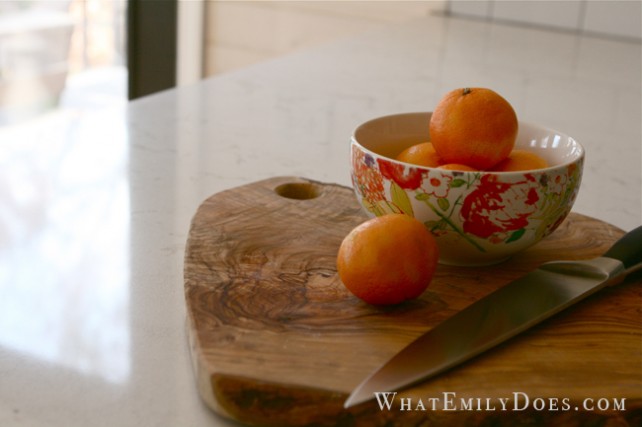
Check out those countertops. They’re a quartz product by Cambria and the color is called Torquay. It is such a low maintenance product which was the top reason for choosing it, but a close second was because it looks like Carrera marble! It is a HUGE upgrade from the beige, 25 year old Formica countertops that were there before.
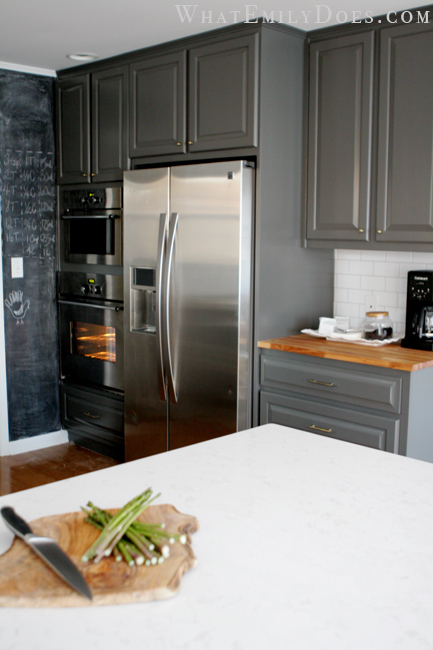
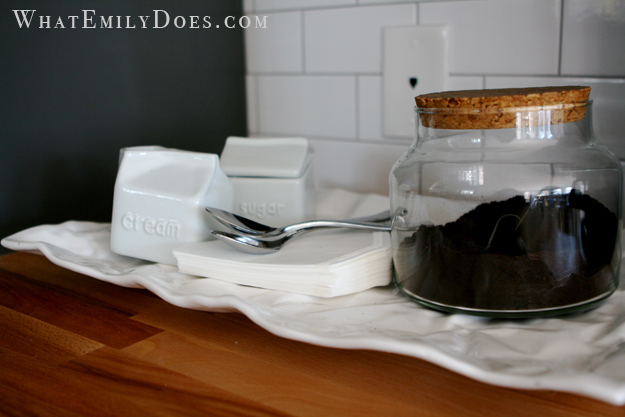
A small butcher block counter space adds such a warm feel. This space was originally a desk-height area which never got use except to drop mail and junk on. We had a counter-height cabinet built with drawers that keeps all of our pots and pans now and is also our coffee station!
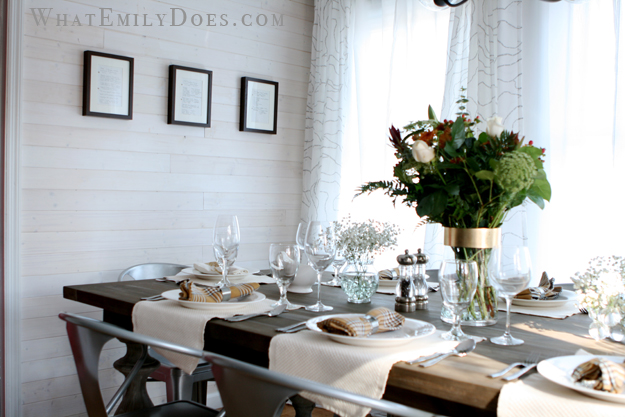
The three frames on the wall have handwritten recipes from a recipe book that my Aunt Judy made for me ten years ago. The book is full of Kirk family favorites that have been passed around for generations. It has become so important to me to keep memories of the Kirk family alive in my mind since there are no more surviving family members of my dad’s immediate family.
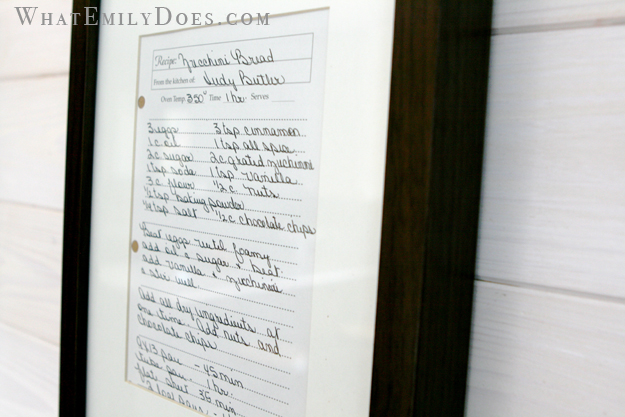
Aunt Judy had the most beautiful hand writing!
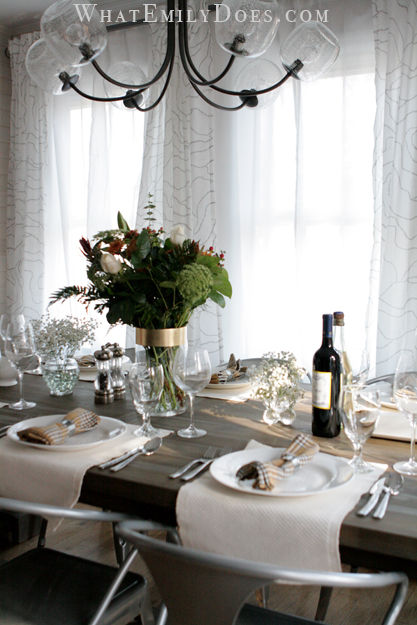 The curtains are all from Ikea. The dining area feels so cozy now and we’re able to close the sheer panels for privacy. The chandelier is from West Elm—it’s a bit funky, but I felt that the space needed a little funk!
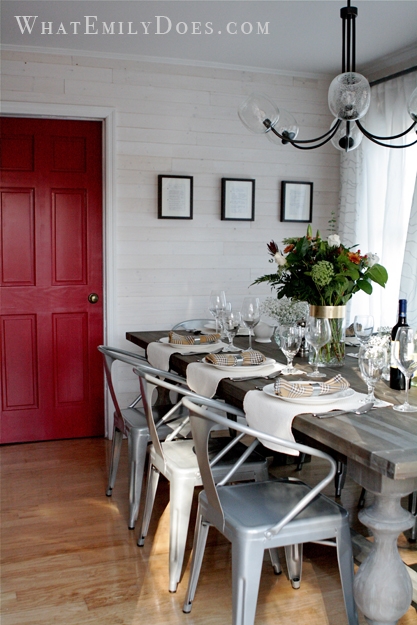
Confession: I really wanted to paint the lantry (laundry/pantry) door a green/yellow color…grellow, if you will. Alex wasn’t having it though, so red was the compromise! I had already bought the grellow paint, but thankfully there was some leftover paint from when the living room was done and we just used that.
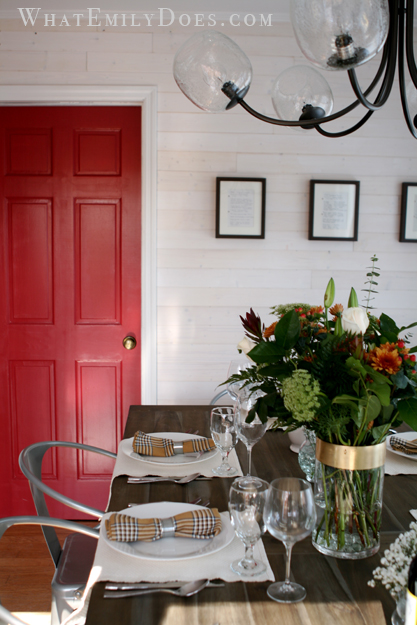
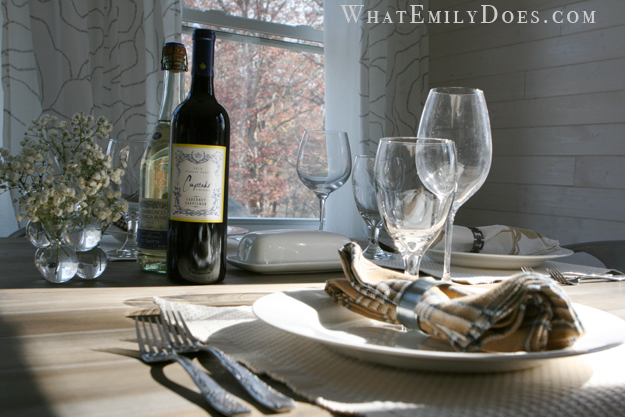
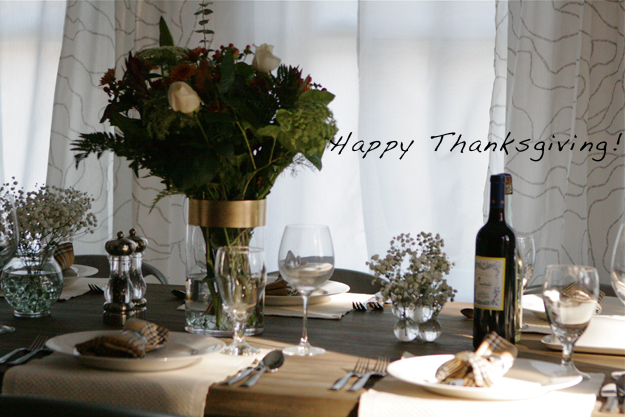
And a few Thanksgiving table scape pictures…
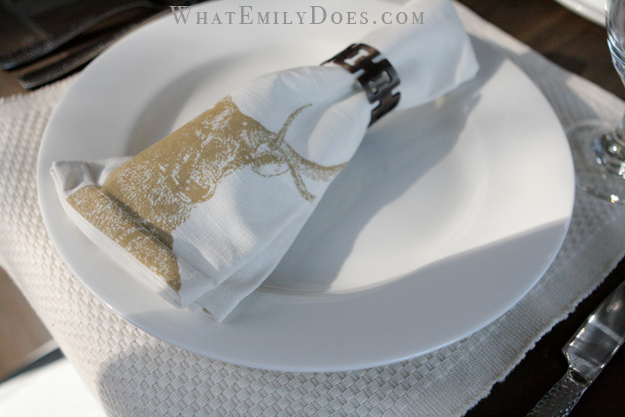
Aren’t these napkins awesome! Target is kind of amazing.
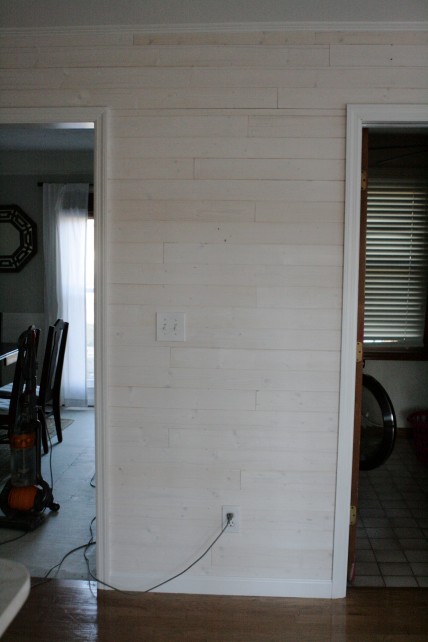
Other than new floors, the last thing that needs to be done is to add a console table in the space between the formal dining room (which will actually become Alex’s office. We decided our kitchen dining table was more than enough seating.) and the laundry room.
I found one on Joss & Main the other day and snatched it up! It should be here in a couple of weeks, but here’s a picture from the website:
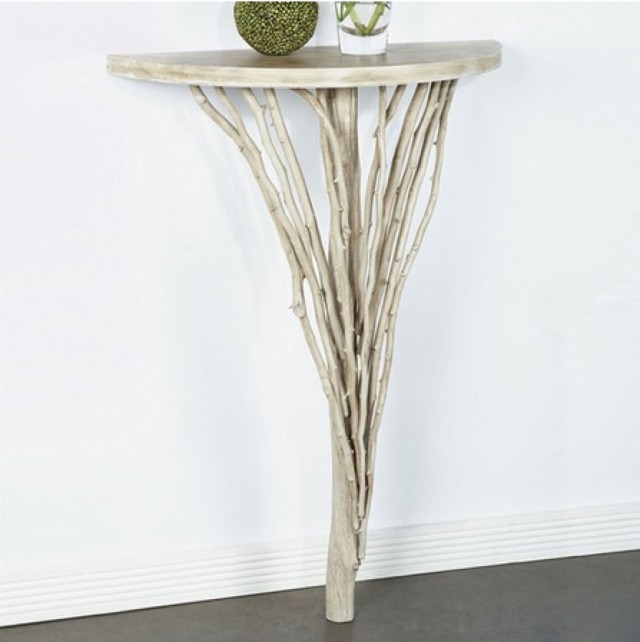
Isn’t it fun? And yes, a little funky too!
So that’s that! I’m so excited that it’s finished and that I can host a Thanksgiving for my family here on Friday.
Happy Thanksgiving!
SOURCES:
Spice Jars (similar)
Butcher Block (similar)
Barstools (similar)
136 responses to “Kitchen Reveal”
Gorgeous! Simply amazing!
Thanks, Jessica!
Looks amazing!! Congrats on a new kitchen!!
Thank you!!
You have a real gift. I love what you’ve done!
Thank you, Ana…that’s a huge compliment!
Proud of you babe!
Looks awesome! All of your hard work paid off!
Hi Emily, I love your table! Can you tell me where you got it?
Hi Angie– I got the table at a Restoration Hardware outlet (for $600!!!).
Ummmmm…. WOW! This is such a beautiful transformation. LIke something out of a magazine. Just gorgeous. I love the two tones of cabinets (bummer about having to redo the top color, but it’s perfect now). And I love all the little details that take it up a notch – the dark trim around the window, the chalkboard walls, the two different countertop finishes. Love it all. And I’m sort of obsessed with your table and the red door. Just such great pops of color and contrast.
Stopping over from Serenity Now.
Wow, what great compliments! Thank you, Kim!
Just wanted to let you know I shared this post on NewlyWoodwards today with a link back. Happy Wednesday!
Awesome..Thank you, Kim!!
Amazing job. There is so much to love about your newly finished kitchen! Love the planked walls, the lighting, the chalkboard walls, the oven hood and the choice of two different colors on the bottom and top cabients. All my favorites in one room – AMAZING!
Thank you for the compliments, Robin! 🙂
Just stunning. Straight out of a magazine! Popped over from Newly Woodwards and I’m so glad I did!
I’m getting spoiled with awesome comments thanks to Newly Woodwards! Seriously, thanks for the great feedback! Just added your blog to my google reader…may have already done a little stalking:)
Wow, it’s beautiful. Great job. (Another follow from Newly Woodwards.)
Did you paint your cabinets? I’d love to know the color/brand if you did. Beautiful kitchen!
Yep, we did! 🙂
The white used is just Sherwin Williams base white…basically the brightest white they can “make”.
The gray was color matched to Benjamin Moore’s Kendall Charcoal.
Hi Emily,
Your home is really beautiful!! The kitchen is truly stunning…I love everything about it. Where did you get your chairs in the kitchen (the metal ones around the table)? I love seeing all your updates….the runner for your stairs really is perfect too!!!
Best, Erin
Thank you, Erin. I bought the chairs off of overstock.com. They were only $50 each!
Dude I LOVE it. I need the scoop on your dinning room table though, I might have drool on my screen. XO.
Here’s the DL on the table: restoration hardware OUTLET. $1400 table for $600!
LOVE love your kitchen and dining area! You’ve done a gorgeous job. I’m going to check out the rest of your house now!
PS- I’ve been looking at those chairs for my dining area but can’t find a couple measurements. Would you be willing to help? It so, would you tell me how tall the arm rest are at the point and how deep they are? I’m trying to determine if they will fit under my table and if not how far they will stick out.
Here’s the link to the chairs. I hope it helps! http://www.overstock.com/Home-Garden/Silver-Tabouret-Stacking-Chairs-Set-of-4/5095638/product.html
Beautiful kitchen! I linked over from Young House Love. You really did such an amazing job. Could you elaborate on how the painting the cabinets part went? Would you have done it yourself? You said you used oil paint? What did you prime with? What about that awesome red door- oil paint again? Did you sand the door down first (is it wood?) and what primer did you use?. Are you feeling like the door and cabinets are holding up? I would love to paint my cabinets and laundry door but just scared they wouldn’t hold up to my four kids using them. Any advice would be so appreciated. Again, congrats on such a beautiful makeover!!
We decided to have them professionally painted (sprayed). I knew that was the best way to go so that they would hold up in the long run. BUT, we encountered some errors with the white cabinets and I ended up painting the wall-mounted parts myself. My cabinet guy told me to buy the high quality oil-based paint from Sherwin Williams (any high end paint store, not big box stores) and use a high density, small, foam roller. You can’t see a difference in my paint job and theres, but it might be different if it was on the doors. My advice, take it for what it’s worth, is if you want to paint them yourself, just use the right paint and you’ll be good to go. I’m not sure about the primer though–I wasn’t around for that part–sorry!
For the door, it’s just a good semi-gloss paint leftover from my living room make-over. The key to painting doors is to cut in around the edges first, then use a foam roller for the rest. I didn’t do any sanding. I just primed the door with one coat of KILZ and it took 2 coats of the red.
Everything is holding up perfect so far! *fingers crossed*
Thanks Carrie!
So great! Where are your dining room chairs from? I’ve been keeping my eye on some from Industry West that are quite similar – love them!
I actually found them on Overstock.com They were 2/$100 and are actually very comfortable!
what are the chairs called? I’d love to find some for our kitchen.
http://www.overstock.com/Home-Garden/Silver-Tabouret-Stacking-Chairs-Set-of-4/5095638/product.html
Here’s the link where I got mine. World Market also carries them.
That is truly a remarkable makeover! We just installed white subway tile this past weekend, but I have yet to decide on a grout color. Mind if I ask what color you used?
Thank you! We used delorean gray grout.
I’m loving this! I wish I could do this right now to my kitchen – except I want to blow out the wall and create more space. So, another few years. Congrats on your kitchen!
Thank you Ashley! It’s definitely hard to wait, but it’s worth it to save up and do it right!
Oh my hopping over from YHL and I LOVE your style! I would love to know where you got your subway tiles.
My name is totally supposed to say Meagan. Typing fail.
haha–What up Meaganagan. That just rolls off the tongue nicely:) We got them at Floor & Decor Outlets in Atlanta.
WOW, what an amazing transformation. I love how the kitchen now looks. I was shocked (did a double take look) to see that you kept the old cabinets and had simply painted it to look absolutely new modern fresh gorgeous (an amazing money saver tip).
Thanks, Ada–I definitely lucked out that the cabinets were solid and in good condition. I’d hate to just toss out a material that’s perfectly fine and just in need of some sprucing up!
Also from YHL. I love your kitchen renovation, particularly the color of the base cabinets. Yummy!
One question for you, though. While I actually think your spices look incredibly charming around the hood, could you confirm it isn’t hot so I won’t worry that your poor spice are losing all their spiciness? 🙂
It doesn’t get hot in the slightest! Also, the glass is really thick and I’ve never noticed a temp change when touching them. I hope they’re not losing their spice-ness! 🙂
Love the red door and especially the framed recipes! So Special
Wow, y’all! This makeover is ah-mazing. I’m sure you’re loving it!
(Came over from YHL – as I’m sure many others have!)
Hi there Emily! Jumping over from YHL. Gotta give it to you… Your taste for style ROCKS!! Beautiful makeover.
Why thank you very much!
Emily, came over from YHL. Love the kitchen. Especially the bi-color cabinet color. The entire kitchen feels fresh, but also like it has been in the house for years. You did a great job. Mind sharing the colors?
Absolutely:
Benjamin Moore Kendall Charcoal & the white is just Sherwin William’s bright white (not mixed with anything, just the whitest they have)
Thanks!
Came over from YHL…you mentioning framing recipes of relatives gave me tears – as to what a wonderful idea that is – I have a big recipe book of recipes written in my Grandmother’s writing- I miss her everyday – what a wonderful & sweet gesture to do that w their recipes! I am copying you on that! Thanks for the idea. (and I’d like your kitchen too, please!!)
So awesome! Can you share with me how much it cost to have your cabinets painted?
Thanks!!
I don’t know an exact cost for just the painting of them because they built a few things for us too. But it’s probably around $1000 for the paint part alone would be my best guess. Not cheap, but better than all new cabinets and it will last a very long time!
Thanks to YHL I have a new blog to read! Love your kitchen. We are looking at two-toned cabinets as well since our kitchen is small dark cabinets would make it feel smaller. Were your cabinets solid wood? I think ours are stock home depot cabinets and not real wood. Wonder if that makes a difference in painting them? Any idea?
I wish I knew! Ours were solid wood. They didn’t have to do any sanding, though, so maybe if your cabinets are in good shape it would work, but I honestly don’t really know. Sorry!
Hi! I found you through YHL. Your home is GORGEOUS, and such an inspiration. Love all the smart buys, and how you got so much value! LOVE IT! You and your husband should be very proud of your home, and of yourselves! Thanks for sharing such inspiration with us all.
Your kitchen and dining room are amazing. You have excellent taste. I am looking forward to checking out the rest of your house. I have just found a new decorating/DIY blog for inspiration. Keep up the good work!!
visiting from YHL and am in love with your kitchen!! curious how you’re liking the overstock chairs? they’re a great price but look a little lower quality than the world market ones. what’s your take? i’m considering the same ones! (and is it okay if i move in?? haha)
They are great! I looked at the WM ones first and is say that they’re identical. They are sturdy and even comfortable:-)
I love your kitchen and the rest of your house for that matter! Where did you get your fruit bowl and the white tray in your coffee area? Thanks:)
The fruit Bowl was a Home Goods find a while ago (actually a clearance find for $6!) and the white tray was a wedding present, but it’s Hotel brand–so Macy’s perhaps? 🙂
I just clicked on your blog link from YHL. I love how cozy and lived-in your house looks. You’ve included a lot of rich details with various textures on walls, table, counters, etc…but it’s still so fresh and home-y. Great job! Can’t wait to see what you do with the rest of your first home. 🙂
Your Aunt looks like she was a lefty- her handwriting slants to the left, which is very much a lefty trait. OH, and having spices over steamy, hot areas (i.e. a stove) is really bad for the spices. I love the kitchen!!
Congrats! It looks great!
Could you tell us more about your plank wall – was it easy to install? I would love to cover up the bad job I did removing wallpaper – I have no idea how it will ever look good again unless I do something similar to what you’ve done!
It really wasn’t hard at all. A bit time consuming and a lot of cutting, but for $200 worth of planks it was well worth it.
YHL jumper, too! I love this! Can you share a little more info about how you did the planking on the walls/what you used or give a link to a post about it if you did one (I’m going to double check for one, though…!).
Scratch that – found it! I’ll be off to Lowe’s! 🙂
Awesome…good luck!
This is incredibly gorgeous. I’m sort of speechless (which doesn’t happen that often). VERY well done!
In a word? Perfect!! I LOVE bright white kitchens but also love dark gray cabinets and you put the two together so perfectly. (There’s that word again!) The stainless steel with gray and bright white subway tiles just give the whole place a fresh professional and creative look. I can’t wait to get my hands on a new kitchen soon! Great job. (Found you through YHL)
Can you tell me what color was used for your base cabinets? I really like how you used white up top and a differenet color for the bottom!!!
The base cabinets were color matched to BMW Kendall charcoal. 🙂
I looooove the kitchen, the dining part is amazing!! Can I please ask where u got the metal chairs!? Love them!!!! Thank you for sharing this is perfection
Overstock.com 🙂
On YHL it said you got subway tile for .21each! Where did you find them for this price? Love the kitchen….I’m inspired!
Floor & decor outlet!
Popped over from YHL to see more pics and tell you that I love love love this kitchen. All of it. The bi-color cabinets, the subway tile, the countertops, the whitewashed plank walls, the red door, the chalkboard wall. Love.it.all.
Hi,
lovely reveal. can you tell us about the long curtain rod or is it more than one rod joined together. I have a similar set of triple windows in a room & was wondering how to find a longer curtain rod so it looks more seamless like your does. love those curtains btw. great job!
IKEA! Their curtain hardware is crazy cheap! What I have is a long skinny and a long wide rod back to back. If you don’t have an ikea near you I’m pretty sure you can buy it online.
This is just what I’ve been wanting to do. It looks amazing! I am going to use your pictures to convince my husband on the two tone cabinets. Love!!!
Your kitchen is phenomenal. Absolutely beautiful!!! It’s kitchens like that that make me think “man! We should get a fixer-upper!” And then it knocks back into my head how much intense work (not to mention money) you have to put into it. But it looks outstanding. I’m sure whenever you sell the house the next owners will be BLOWN AWAY from the befores and afters!
It’s definitely work. I call it my part-time job after my full-time job as a nurse! But I like it!
Emily,
This is such a beautiful kitchen makeover … it makes me giddy!!! We are nearing the completion of our own kitchen makeover and I have a few questions for you. Did you follow a tutorial for your plank walls? If so, can you share it? What kind of wood did you use and how did you whitewash it? Also … your kitchen window … does the color match your cabinets or is it black? Did you paint the actual frame of the window or did it come in the black shade? BTW, I love the wooden cutting board that you have … where did you find it?
1. No tutorial–but it’s pretty straight forward. The planks are v-groove…you just put them together! I would say start at the top of the ceiling and go down. Door ways can get tricky if you don’t start at the exact spot all around. We used a nail gun (otherwise it would take FOREVER) and just nailed in to the tongue part so no nails are visible. That’s about all the tips I have for you! Oh, and remove the trim pieces first and place back on top. Okay, that’s all 🙂
2. Evertrue Pine v-groove planks from Lowes. Minwax white wash…that they don’t make anymore 🙁 I’m sure you could find another if you looked around though.
3. The window above the sink is painted the same color as the cabinets–BM Kendall Charcoal. I painted it myself!
4. Cutting board was a Home Goods find:)
I love your kitchen! You did such a great job! I have one question…what did you use on your planks? Is it a white wash or paint? I tried to read all the comments to see if you’ve answered this question already and could not find it 🙂
Thanks
I used a minwax white wash stain….that they stopped carrying like 2 days after we finished!!! Search around for a white wash, though..some call it “pickling”. Good luck!
Awesome thank you
Amazing!!! I have been looking for chairs like yours forever but didn’t know the name of the style. One thing you could consider instead of doing flooring under the oven is to continue the cabinet across the base where the opening is and just make it look like a built in!
good idea!
chairs: Silver Tabouret Stacking Chairs on Overstock
Emily– what are the dining room walls? Are the planks wallpaper or…?
Planks–Evertrue v-groove pine planks you can find at Lowes. 🙂
[…] really want this kitchen. And makes me super want to own my own house, or demolish my rental kitchen and just do it […]
I’d love to see more on how you did your plank walls, but I can’t find the post in your blog. Did you write one? And if so, where can I find it? Thanks!
I didn’t do a detailed post about them 🙁 Wishing I had now because I’ve gotten this question a lot! I used Evertrue V-Groove pine planks. They are pretty self explanatory, you just have to make sure you start at the exact same height at the bottom so it stays even all the way up and around doors or windows. It’s a job any DIY-er could tackle. A bit time consuming, but not hard.
Beautiful! I love how pretty but liveable this kitchen looks! Can’t wait to go check out the rest of your blog!
Found you on Young House Love and am so impressed with your kitchen! It’s gorgeous! Love the colors, love the choices, love it all. Really great job!
Followed from YHL….seriously love your kitchen! Can’t figure out my favorite part though I love the bi-color cabinets and the red door! You have an amazing eye! Will be sure to add your blog to my regular-reads.
Visiting from YHL….LOVE your kitchen and dining room area!!!!!! Great job!
Y’all did great! It looks amazing!
Hi,
Love the kitchen. Where did you get your subway tiles and what color are they.
Thanks
David
Floor&decor outlet. I think they were just called bright white.
thanks!
Was the original ceiling in your kitchen textured? It looks like it might have been in some of the pictures. If so, how did you smooth it over?
Thanks!
Hi Jessica! The original ceiling was textured, and because we removed upper cabinets and changed out lighting (meaning lots of holes in the ceiling), we went ahead and splurged on getting the contractors to scrape and re-mud the ceiling. That’s just not a DIY job I’m willing to tackle:)
Hi Emily!
Saw your kitchen via YHL, and had to pop over to say how amazing it looks! Seriously, what a transformation!
Anyway, I was wondering – what are your thoughts on the Cambria Torquay, now that it’s installed and you’ve used it for a while? I’m thinking of using it myself (or Caesarstone’s “Misty Carerra”), and would love to hear what you think of it. Does it really look like marble in person? I have seen the 12×12 samples, but not a larger, installed counter in person before, so I’m curious 🙂
Also, would you mind sharing how much it cost, with installation?
Thanks so much, and again, congrats on a job well done – it looks fantastic!
Hey Kristen–I still really love the countertops. I think you can certainly tell it’s not carrera marble, but it’s as close as you can get without it being the real thing, and the best upside for me is that they’re maintenance free! No worry of staining them or anything. We paid $59/sqft and that included instillation and an undermount sink. Thanks for stopping by! 🙂
Beautiful transformation, and you got a great deal on the Cambria. We got 3 bids on doing Cambria, each one is over $100 sq.ft.
I love your kitchen. Actually love it so much that we are shamelessly copying your look…going to paint the lowers and island in Benjamin Moore Grey which is dark and moody like your Kendall Charcoal grey and the uppers in Simply white. Also going to do the cabinetry around our fridge too – such a nice finished look! Can’t wait! You guys got a great price on your countertops – I was quoted $90/sq ft!
Thanks for all the inspiration!
I’d love to see your finished product!
Did you paint your exterior door the same color as you dark cabinets or is it black? I can’t tell. VERY Beauty FULL Kitchen 🙂
They’re black:)
I’m sorry to bother you again :-/ but can you tell me what the name of the color is?
Can you tell me where you got your faucet? I adore it!
Oh gosh…I can’t even remember! I know faucetdirect.com has it, but I know for a fact I didn’t pay $400! Sorry:(
Ummmmm…HOLY GORGEOUSNESS, Batman!!!!!!! The kitchen looks INCREDIBLE, and I have GOT to get over there and see it in person!!!!!!!!!!!!!!!!!!!!!!!!!!!!!!!!!!!!!!!!!!!!!!!
Anytime! 🙂
[…] …and so did Emily from What Emily Does: […]
Hi Emily,
I just found your beautiful blog this morning through Layla’s blog. Outstanding !!!! kitchen redesign. You are very talented!!!!
My husband and I are working on our kitchen, I’m going to reveal it in a few months. I’ll keep you posted if you like. Thanks again for sharing 🙂
Emily, I just came across your blog and I love what you did with your kitchen. What is the red that you used on the door and is it flat or semi-gloss enamel? It looks beautiful. bds
I honestly can’t remember the color:( It’s a semi-gloss though.
[…] STEWART 2. photo ELLE Norway via REMODELISTA 3. photo Lucas Allen via DESIRE TO INSPIRE 4. WHAT EMILY DOES 5. INTERIORS PORN via Desire to inspire 6. Photo: Nick Pope/IPC Images via THIS OLD […]
What is the deminsions from window/sink to the right? Do you like the work flow…cramped with Oven? Curious. I have a similar layout and we are getting ready to remdoel.
This is beautiful, Emily! What a wonderful blog, and blog entry. Many kudos!
Thanks Abby! 🙂
[…] a few minutes (or hours) to drool over the most gorgeous kitchen renovation at What Emily Does. Oh. My. Word. It’s […]
I love the transformation! Out of curiosity, what did you do with your hinges? I noticed that in the before pictures you can see them.. and then in the afters they are gone. Did you install new ones? We have a similar predicament in our kitchen, and would love to hear about your solution!
Ha! I love that you noticed it! It makes such a big difference in how the cabinets look. We did install new hidden ones and puttied the holes from the old ones–and by we I mean my contractor. It was definitely worth the money because of how good it looks without the exposed hardware.
Hi Emily, where did you get your tile? Right now I’m having trouble pairing a white quartz counter with a white subway tile.
I got mine at Floor & decor outlet in Atlanta, but I’ve also seen it at Home Depot.
Do you know how thick your countertops are? 2cm, 3cm? Mitered edge? Thanks!
Hi there. I would love to know the brand on the barstools. Thanks!
Sorry so late to reply! I found those at Home Goods a few years back.
Question- that wall you crates to the right of your oven/range – did you make that? And did it cost a lot? We have a 4″ Gap between our oven and counter top so looking to create a wall like that
[…] great options at less than $60 each. (And probably what we’ll end up getting too.) Via 5. Wood Floors and Stain-Hiding Rugs As beautiful as creamy white rugs are, they’re not […]
Lovely kitchen!! What grout space did you use? Do you use a spacers or the standard tile lug? 1/8 or 1/16? Thanks!!!